How to Fit a 3 Sided Bay Curtain Pole Back to top
Roughly Work Out the Position of the Support Brackets
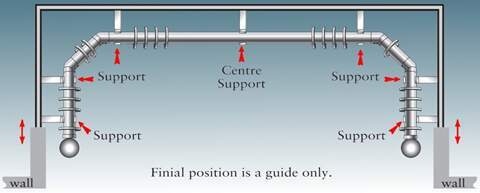
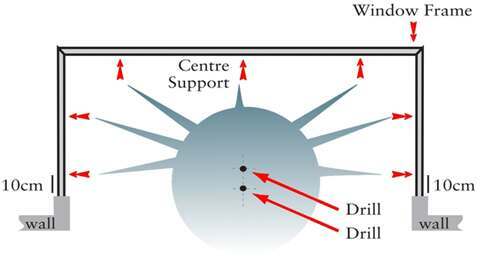
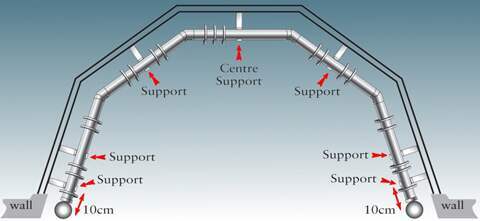
Ensure the position of the centre support bracket is in the centre of the window.
Evenly space the position of the rest of the support brackets, ensuring that they will not interfere with the corner joints.
Mark and drill the holes for the fixing position of the brackets.
For particularly heavy curtains or if you wall is unable to support individual brackets properly, we suggest fixing a wooden batten in the bay at the bracket height, and fixing them to this.
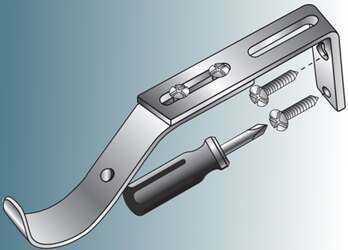
Put the rawlplugs into the holes and screw into position.
Many fixing brackets are adjustable. This feature is often required to accommodate obstructions in the window such as over-sized handles and sills, radiators or for certain curtain headings such as eyelet, tab top and slot headed curtains. It is a good idea to resize all the brackets to your required length before you put them up. You may then easily measure them against each other to ensure they are all the correct length. Any fine adjustment may been made to individual brackets later, once your pole is in place.
How to Adjust the Length of the Curtain Pole
It may be necessary to adjust the length of the curtain pole.
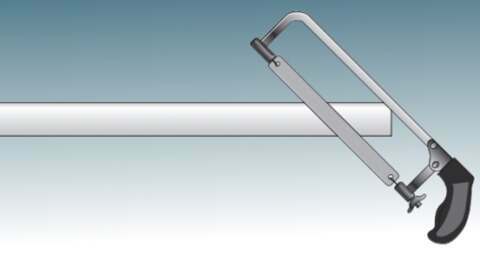
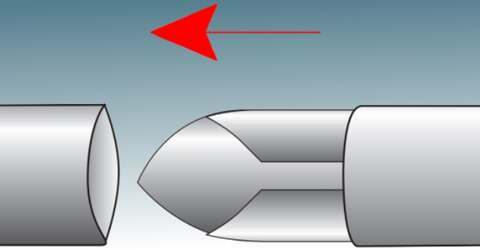
Please ensure that you cut an equal amount off the end of both poles so the join remains in the centre of the pole.
When you are cutting the pole to the correct length, please ensure you allow for the length of the corner brackets.
Fully assemble the pole before you place it in the brackets.
a. Join the longer lengths of curtain pole together using the joiner bar
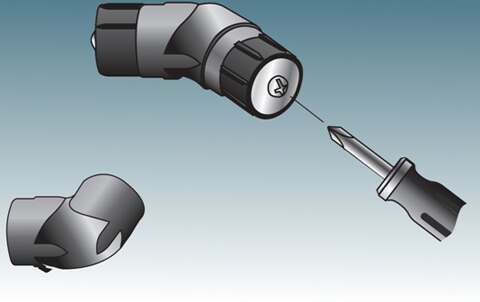
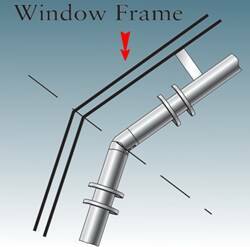
b. When the elbow joint has been set at the correct angle for your bay corners, tighten the screw on the elbow joint to set it securely at this angle, as shown in the diagram.
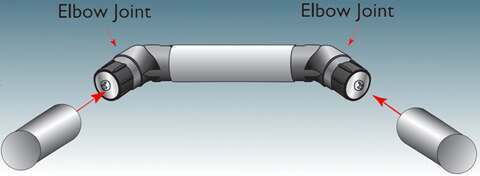
c. Push the elbow joints firmly into the ends of the poles. When assembling the poles ensure the Elbow Joint screw is facing downwards.
Fitting the Curtain Pole
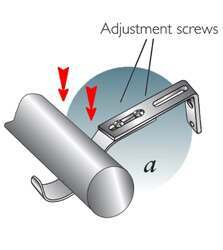
a. Fit the assembled pole onto the support brackets.
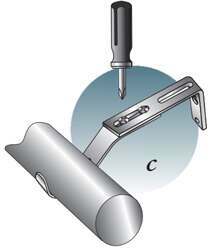
To help to align the pole, there are some adjustment screws on the top of the support brackets.
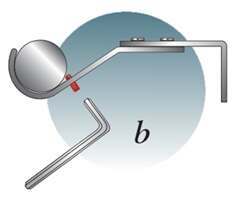
b. Secure the pole in position.
Tighten the grub screw underneath the bracket with the allen key that is provided with the pole.
c. Tighten the adjustment screws on top of the bracket.
Check the curtain pole is far enough from the window to allow for window protrusions and folds of certain headings.
Finish assembling the pole.
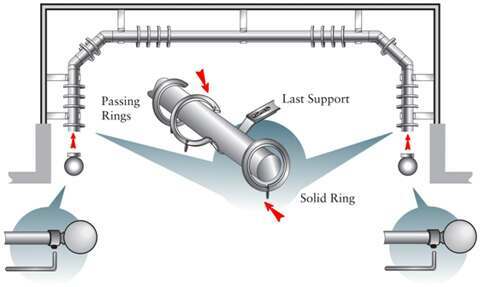
a. Fit the passing rings on the pole.
Place the rings on to the pole by sliding them or clipping them into place.
b. Fit the two solid curtain rings.
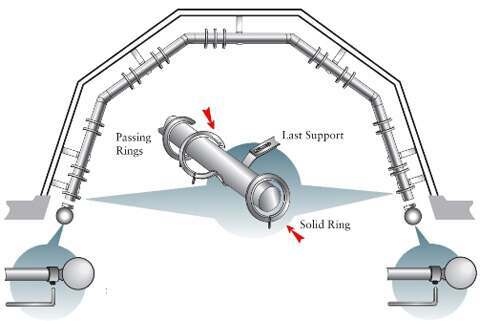
The two complete rings provided in your bay kit are fitted after the last support bracket at each end of the pole, to hold the curtains in position when they are closed.
c. Fit the curtain finials.
Position a finial onto each end of the pole by either pushing it into position, or securing with a grub screw, which is tightened with the allen key provided.
How to Fit a 5 Sided Bay Window Pole Back to top
Roughly Work Out the Position of the Support Brackets.
Mark and drill the positions of the support bracket fixings.
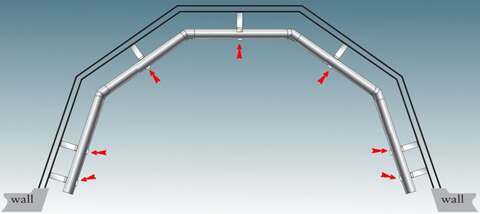
The centre support bracket must be fitted in the middle of the window.
If possible try to fit the rest of the supports in the centre of each flat section of the bay window.
Please check that they do not interfere with the corner joint brackets.
You will need a 6mm drill bit for the usual size of rawl plug in a normal wall.
Fit the rawl plugs.
If you have a plaster board, that is hollow behind the board, you will need rawl plugs designed for this type of wall
if your wall is of a construction that does not support individual brackets securely, particularly for heavy weight curtains, fit a wooden batten in the bay first and secure the brackets to that
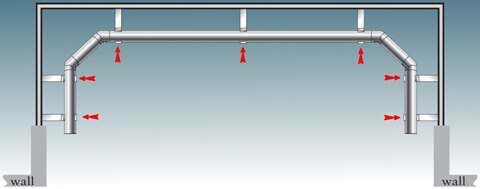
Screw the support brackets into position as shown.
The brackets are adjustable to allow for the curtain pole to extend away from the wall if required.
How to Adjust the Length of the Curtain Pole
It may be necessary to adjust the length of the curtain pole.
Please ensure that you cut an equal amount off the end of both poles so the join remains in the centre of the pole.
When you are cutting the pole to the correct length, please ensure you allow for the length of the corner brackets.
It is most important that the corner joints of the pole are in line with the corners of the bay window frame.
Assemble the bay pole before fitting it into the wall fixing brackets. You do this by pushing the elbow joints securely into the ends of the poles.
When assembling the poles ensure the Elbow Joint screw is facing downwards
When the elbow joint has been set at the correct angle for your bay corners, tighten the screw on the elbow joint to set it securely at this angle, as shown in the diagram.
You will now be ready to put the assembled pole into your bay window.
We recommend that 2 people undertake placing the assembled pole onto the fitted wall fixing brackets.
a. Fit the assembled pole onto the support brackets.
Loosen the adjustment screws on the top of the extendable fixing brackets. This will help you to align the curtain pole.
b. Secure the pole in position.
When you are happy with the position of the curtain pole, hold the pole in position.
Tighten the grub screw underneath the bracket with the allen key that is provided with the pole.
c. Tighten the adjustment screws on top of the bracket.
Check the curtain pole is far enough from the window to allow for window protrusions and folds of certain headings.
Finally tighten the adjustment screws on the top of the wall fixing brackets.
Finish fitting your new bay pole and hang your curtains.
Fit the specially designed curtain rings onto the pole by either sliding them onto the pole, or clipping them into position.
These bay window curtain rings should all be fitted before the last support bracket. After the last support bracket on either side of the pole, slide the remaining two solid rings. These rings will hold the curtains in position at the ends of the pole.
Place the curtain finials onto the pole, either by pushing them into position or securing them tightly with the grub screw.
SHOP NEW - Our Range of Curtain Poles for Bay Windows Back to top
Click on these links to go straight to our most popular, best selling bay window poles.These bay window poles are consistently praised by our customers for quality, value for money and ease of installation.


